Pivot Point Mechanics and Leverage: When lifting a load with your arms extended straight in front of you, efficiency can be improved by bending the elbows, which shortens the lever acting against you. Once the elbows are bent, you can further optimize the movement by selecting an effective pivot point based on mechanical advantage. For example, you might use the opponent’s wrist as the pivot point and move other parts of the body around or underneath that point to gain leverage.
Power though a line: We often rely too heavily on muscle-based effort, applying weightlifting habits directly to real-life situations. This can cause us to overlook the difference between muscle-driven force and structure-driven force. For instance, pulling someone off their feet requires power, but that power does not have to come solely from muscular effort. It can also be generated by aligning your skeletal structure efficiently—positioning your body along a strong line of force—rather than relying on poorly aligned, isolated muscle exertion.
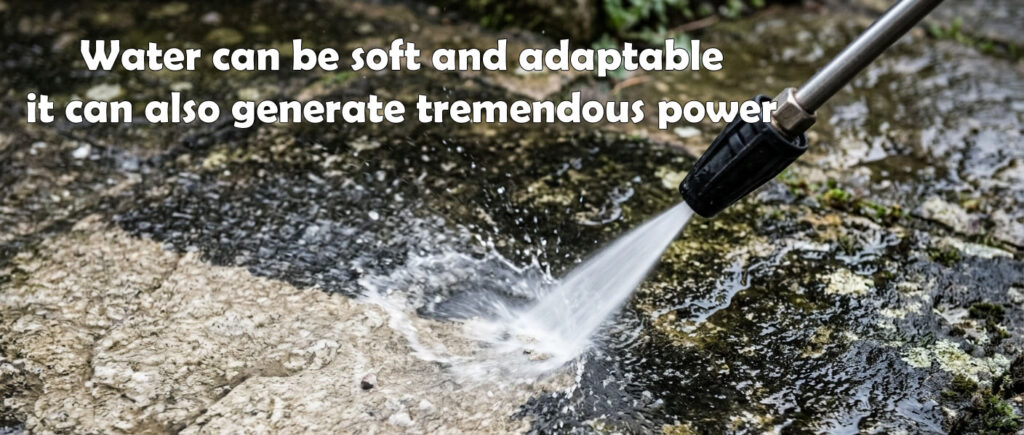
Focused power: When you narrow the “aperture” of a garden hose, the water exits with greater force due to increased pressure. If there is a leak along the hose, some of that pressure is lost before reaching the end. Similarly, while blunt force can generate power, it lacks the penetrating efficiency of a more focused output. The human body operates in a comparable way: if there are “leaks” in your structure—misalignments or breaks in force transmission—your overall power output is significantly reduced.
Application of what you have learnt: The more you apply these concepts in daily life, the more confidence you build through direct experience. For those who have trained for decades, even without engaging in physical conflict, the benefits are substantial. These include improved fitness and health, greater strength and adaptability compared to peers, and the ability to apply general principles and philosophy to help others.
SCENARIOS
Review of wrist escapes
Aside from the Low grabs, we reviewed the high wrist grabs and corrected some of the most common mistakes. Then we reviewed how to handle the various high wrist grabs:
High across wrist grab
High same side wrist grab
Low across over-hand grab
If you cannot remember, of course you can ask in the next class. However, do try to apply the logic or mechanics from techniques you have already learned and see if you can derive a workable solution.
Experimented with the pull mechanics
When I say “relax” while pulling, I do not mean becoming loose or weak. I mean avoiding unnecessary tension that creates internal resistance and works against your own leverage.
You should visualize a continuous “power line” running through your body. In this case, it extends from your feet to the tip of the opposite shoulder. Any part of the body that is not aligned with this line should move toward it. Likewise, any body part contributing force should stay as close to this power line as possible to maximize efficiency and minimize energy loss.
It is important to understand the intent of this class so we have a shared understanding:
Not sport combat This is not a sport combat program. You will not be trained to adopt a guard stance or move in a way typical of competitive fighting (e.g., bouncing or circling).
Physical conditioning with realistic expectations You will develop strength and conditioning as part of the training. However, the goal is not to become stronger or faster than an aggressor because that is not something that can be planned. We are on a downward slope. I do not want to teach you something that may be valid this month but not over time in the future.
Movement and risk awareness While creating distance can be useful, simply running away is not always a reliable solution. In many cases, the aggressor is probably faster and more mobile than you. There are also environmental risks to consider—such as stairs, sharp turns, or uneven terrain—which increase the likelihood of losing balance or falling.
Confidence Confidence is something you must earn for yourself. No one can give it to you, no matter how much they care about you. You have to understand and practice to own everything that you were taught. It is a lot of work but the payback is that you will gain new perspective on how to use the body you own. You should not simply copy movements. Instead, strive to understand the underlying concepts and mechanics. This understanding allows you to adapt to different situations—and ultimately, to make the skills your own.
The emphasis of this training is on practical, realistic responses based on your abilities, positioning, and situational awareness.
Non-Combat Preparations
Prioritization and Preparation for Theft or Loss: Protect essentials, not replaceables; pre-plan to avoid risky reactions. Maintain phone/cloud backups, keep an extra credit card at home, and inventory cards on your phone. Do not chase faster assailants; prepare, prioritize, and let go when needed.
Instinct Management and Immediate Response: Train the instinct to relax, exhale, and assess before reacting. Most of the skills you learn here requires you to keep calm and think quickly and adapt with a cool head.
Maintaining Safe Distance and De-escalation: Set proactive personal space with hand gestures and clear statements (“I’d like to keep my distance”). Use verbal de-escalation, topic changes, and natural smiling; confirm bad intent via behavior tests (e.g., crossing streets to see if followed) and remember the avoidance steps and yet he still persist to justify any legal issues if you hurt him badly.
Fall-Prevention and Impact Absorption: One of the most common random attacks is a big shove to get you falling onto the ground. You need to survive that without injury to make any of the techniques you learned work. You protect yourself from the impact by distributing the force of impact over a big area and over time by slowing down the fall. Train to get your triceps stronger; use fingertip-to-palm contact with bent elbows; start near 90° joint angles, avoid acute angles, and absorb without passing unsafe ranges. Rolling is secondary; practice wall and ground absorption first.
Power of Mind and Body Working Together
While many people talk about the importance of aligning the body and mind, it is often left in abstract, philosophical terms. In class, we demonstrated this concept in a practical way, allowing everyone to learn and experience the differences for themselves. In short, we refer to this mental process as “projection.”
Train Slow to Change Habits
Learning a new movement pattern is not easy. Responding with that newly learned pattern under pressure is even more difficult. The idea of “relaxation” may sound simple, but it is one of the most challenging aspects of developing “effortless” power.
This is especially true when you are forced to react quickly—you will most likely revert to familiar muscle-against-muscle responses. However, as you age, this approach becomes less reliable and continues to decline over time.
A common reaction under stress is to tense up. However, tension—if not applied appropriately—can actually create leverage against yourself.
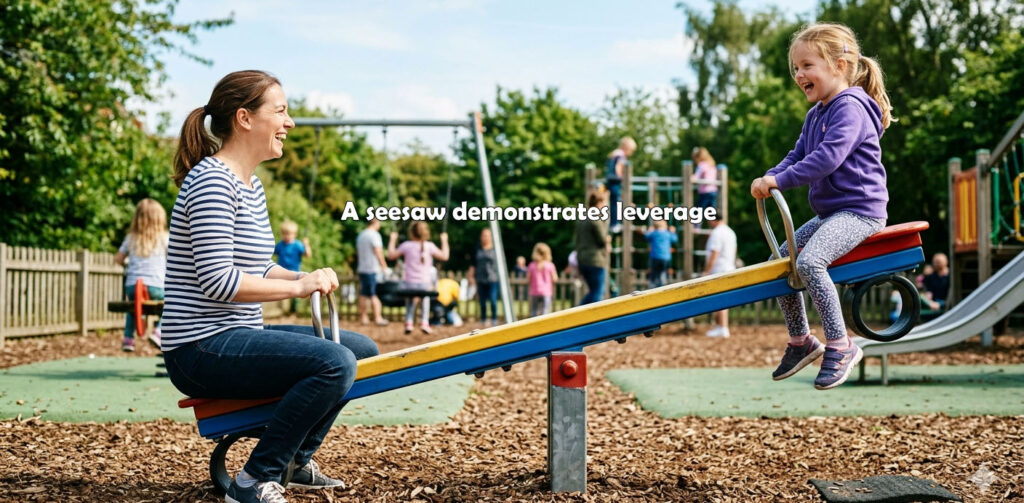
Consider a seesaw. In a fixed system, the pivot point stays in the middle, and balance depends entirely on the weights on each side. But imagine a “smart” seesaw that can adjust its pivot point or change the flexibility of the board. By shifting the pivot or altering tension, it could neutralize weight differences or even allow a single person to operate it effectively.
Relaxation functions in a similar way. It changes the entire leverage system rather than forcing you to work within a fixed one. This adaptability can disrupt the opponent’s expectations and create mechanical advantages that are not obvious.
Additionally, relaxation reduces telegraphing. When you remain relaxed, your intent is less visible. In contrast, excessive tension often signals that you are about to act, making your movements more predictable.
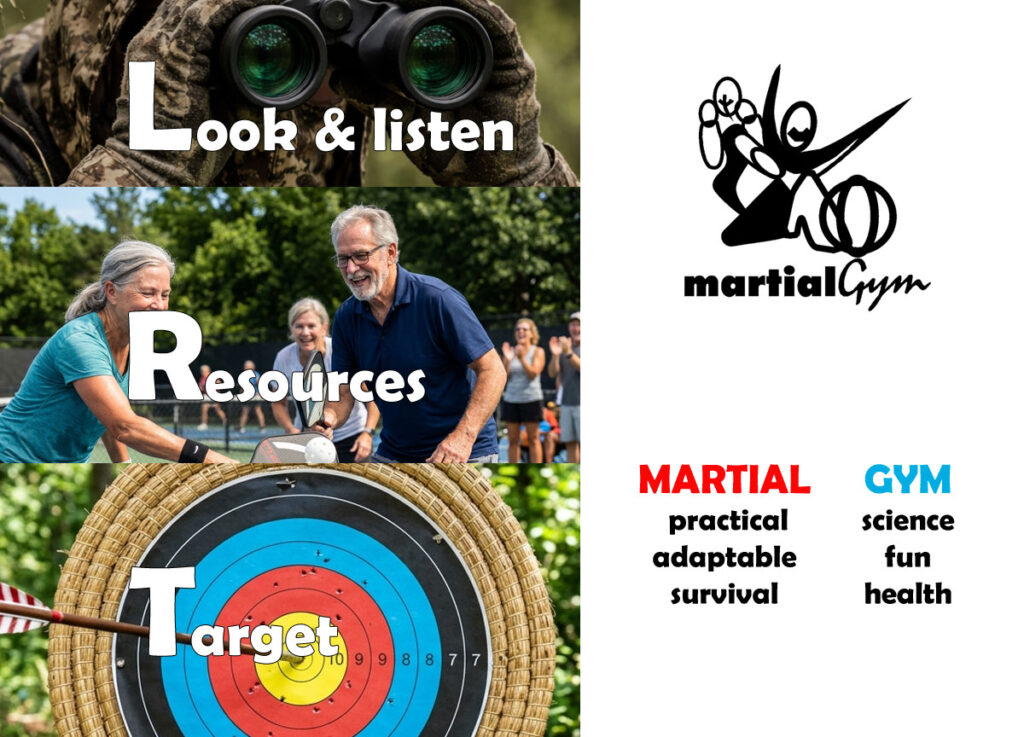
3 Principles of Self Defense (LRT)
L — Listen, Look This principle is about awareness—paying attention to your surroundings using all your senses. Recognizing what is happening around you allows you to prepare and respond appropriately.
It also includes trusting and verifying your instincts. When your gut signals that something is off, use observation to confirm potential ill intent. Assess the situation: are you facing a one-on-one or one-against-many scenario? What can you see—and what might you not see? Make informed assumptions about relative strengths and weaknesses so you can plan ahead.
R — Resources Resources include your skills, physical attributes, and available options. This covers your training in self-defense, your understanding of mechanics, and your ability to adapt to different situations and constraints.
Factors such as mobility, strength, reaction time, and speed all play a role. However, this is not just about your own capabilities—it is also about the gap between you and your opponent. The objective is to limit your opponent’s strengths while positioning yourself in areas where you have an advantage.
Planning is critical. Know your personal “red line.” Consider practical matters—for example, are you prepared to give up your phone or belongings if necessary? Be aware of environmental resources as well, such as exits, barriers, or objects that can assist your movement or positioning.
T — Target This principle focuses on both avoiding becoming a target and understanding targets within a situation.
Do not become a visible target. Predators tend to observe and select individuals who appear vulnerable or isolated. This is not about restricting your rights, but about understanding the risks associated with certain behaviors.
Do not become a static target. Remaining still makes you easier to approach and attack. Movement forces a potential attacker to expend more effort and often discourages action.
Understand intent and outcomes. Try to identify the attacker’s objective. If the situation risks causing permanent harm to you or someone you care about, that may define your red line and you may have to act decisively. “Make him pay dearly” should be your mindset at that point.
Make decisive assessments. Quickly evaluate your options and, if necessary, identify actions that may cause the attacker to disengage or reconsider.
SCENARIOS
Low Cross Center Thumbs-up Grip – Relax the fingers and wrist, draw your finger tips around grabber’s wrist all the way, step and reposition.
Low Cross Center Over-hand Grip – Project through fingers, keep your arms slightly bent, big step in and elbow to elbow, handover and strategically reposition.
Low Same-side Grip – Project through the fingers, elbow-to-elbow and finger-to-belly-button to regain control without escalating force; big step to reposition strategically, smile and talk to change his intent.
Fall Protection Basics
We have to protect our head and hands when we fall forward. The most vulnerable body part is the wrist. If the arms are not fast enough or strong enough, then you may smash your face onto the ground.
Do remember the following keywords: Finger tip, finger, palm, elbow
Do remember to check our YouTube channel “SeniorsCorner-MartialGym“. It is a new channel and I need your likes, comment and subscribe to get the word out so that more people can be helped by the videos.
Nobody is using the room before our class, so I encourage you to arrive a little early. This gives you time to warm up, work with different partners to practice techniques, and develop adaptability. You can also use this time to ask me any questions.
As discussed previously, there are different levels of relaxation:
Tensed – The muscles are fully stiffened. This may be useful in bodybuilding when the goal is to display muscular definition. However, from a functional perspective, tensing the entire body slows down athletic movement. In martial arts, it also creates a rigid leverage structure that an opponent can easily exploit.
Technical Relaxation – The term “technical” indicates that this is not passive relaxation, but one with specific requirements and objectives. Technical relaxation involves maintaining intent and structural integrity while minimizing unnecessary tension.
Limp – This state is functionally ineffective in a martial arts context. It resembles an overcooked noodle—lacking structure, intent, and the ability to generate or transmit force.
What is moving and what is staying still
When lifting a light object, you usually don’t give it a second thought—you simply pick it up. However, when handling a heavier object, you instinctively adjust your position, such as bending down or squatting, to avoid injury. Efficient mechanics not only protect you but also allow you to work more effectively.
Leverage always involves three elements: the pivot, the effort, and the load. If the intended pivot does not remain stable, the entire leverage system is compromised. Consider a door hinge: if it is not properly anchored, the door will not move smoothly.
When people think about generating power for punching, they often assume that rotation must occur around the spine—the body’s vertical center. This is a common misconception. In reality, we have multiple options depending on the objective. For example, rotation can occur around the left hip, the spine, or the right hip. Furthermore, the center of rotation does not have to be within the body—it can also be external, such as above the head or at the opponent’s wrist or hand. Each choice produces a different mechanical effect.
SCENARIOS
Test the integrity of your push against a partner
After practicing isometric push exercises, test them with a partner. You may perform well against a fixed object like a wall, but your body and mind often behave differently when facing a real person.
One of the most common mistakes to watch for is telegraphing—preparing the movement by settling into a stance before applying the push. This gives away your intent and reduces effectiveness.
Other issues to look for include:
Leaning forward excessively, which compromises balance and structure
Maintaining an upright posture through tension rather than relaxation, limiting responsiveness and efficiency
The goal is to apply the same structural integrity and intent you developed in solo practice, but under the dynamic conditions of working with a partner.
EXERCISES
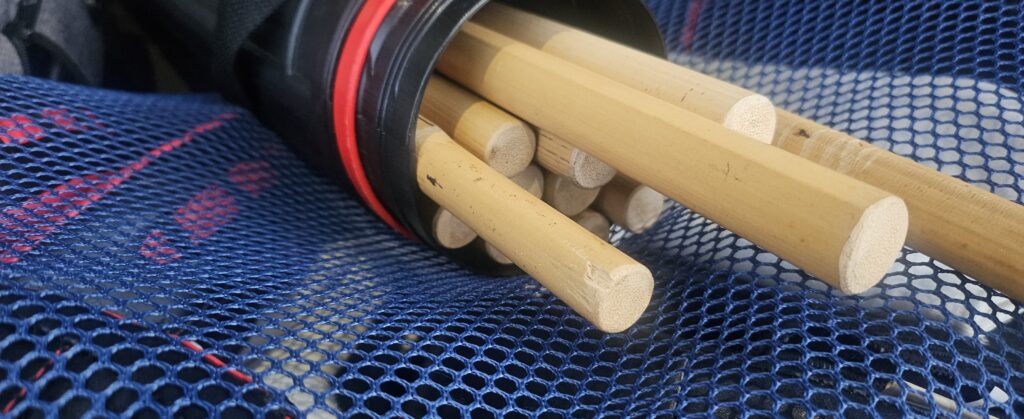
Training Sticks
Practice using a stick approximately ½ to ¾ inch in diameter and approximately 28 inches in length. You can hang a towel as a target for practice. Grip the stick 1–2 inches from the end. Focus on striking your selected target for accuracy..
Include the following drills:
Helicopter rotations (arms extended)
Arm swings – left and right
Figure-eight patterns – from top as well as from bottom slicing up
Close-range adjustments (hip rotation and wrist alignment)
At this stage, the primary goal is to develop hand-eye coordination so the stick can reach the target with precision. Do notice your elbow position as well as palm placement for each of the swings.
Equipment and Safety
Avoid overly heavy sticks, as your wrist may not be strong enough to control and decelerate them safely
Do not use fragile items (e.g., umbrellas), as they may bend or break
If the stick is too slippery, apply tape (similar to a hockey stick) to improve grip
Discard any cracked sticks to prevent them from breaking during use and causing injury or damage
Sticks of all sizes are easily accessible, but different sizes each have different considerations. At this stage, we standardize on one size to develop wrist and forearm strength before progressing to longer sticks or two-handed grips.
Isometric Push
This is a highly effective exercise for developing structural unity and strengthening the muscles involved in the pushing power chain.
Push against a wall or a horizontal bar using strong, slightly bent arms. The goal is to train and feel the correct mechanics of a forward push.
Key Points to Observe:
Center of Gravity Your center of gravity should be positioned between both legs. It should not be directly above the rear leg. When pushing against an immovable object, Newton’s Third Law applies—your push generates an equal and opposite reaction force, which can destabilize you if your structure is misaligned. Position your center of gravity at least six inches in front of the rear foot to create proper structural support during the push.
Joint Stability No joints should move during the push. Maintain fixed angles throughout the body—for example:
The angle between the forearm and upper arm
The angle between the thigh and shin
A relatively upright back
Apply pressure by squeezing down and forward without bouncing. Back leg should be bent. Load from the back leg with a slight bend in the elbows, then sustain the pressure for short durations (10–20 seconds).
Structural Integrity You should feel and identify any “leaks” in your structure—any unintended changes in alignment and angles of joints during force application. The pressure should transmit cleanly to your arms without any visible movement.
SIDE NOTES
Some of you may have noticed that I added “Bonsor” to the title. This is because I have recently started teaching at Confederation Seniors Centre (CSC), so please keep that in mind when reading the class notes. You may have to scroll down a bit to find the latest notes.
At CSC, this is a new SSD program in North Burnaby on Thursday evening. I am experimenting with a 1.5-hour class format. As it is a trial, it will run for four weeks only. Reading their class notes might provide you with some new insight.
The alignment of intent and bone structure plus the connection to the ground will generate more power than counting on isolated muscle effort. Structural power is more efficient, consume less energy and therefore will last longer, and yet be able to accomplish more.
In the scenarios taught this weeks, creating a diagonal force line from the front foot, through a straight diagonal line through the hip and spine, and ultimately to the shoulder, using the entire body as one connected unit gives you a really strong pull as compared to using just arm strength..
Re-Directing Force
A principle for handling direct force. Instead of opposing force head-on, move tangentially (or think perpendicularly) to the line of force. This helps nullify his direct force and he will feel unbalanced. For a person with less strength, absorb and redirect works a lot better.
Building Instinctive Responses
The goal is not just to learn physical self-defense techniques, but to develop instinctive responses grounded in solid principles. This requires understanding the underlying mechanics and applying them consistently—even in ordinary, non-confrontational, and unrushed situations.
For example, when pushing open a heavy door, avoid relying only on your arms. Instead, engage your whole body—align your structure, connect your movement, and apply force through your base.
Similarly, if someone (even a child) grabs your wrist and it becomes uncomfortable, avoid reacting with tension, forceful yanking, or verbal resistance. Instead, calmly apply the escape principles you have learned. This reinforces proper mechanics and helps condition your responses to become natural and automatic.
SCENARIOS
Two-Hand to Two-Hand Escape Techniques (Natural Grab and Crossed Grab)
These movements are difficult to fully convey in writing, if you missed the class or simply can’t remember how to do it, do ask anytime. Furthermore, test it against different partners, every person is different and it is important to learn to adapt as well.
The following key principles are essential to understanding the technique:
Focus on one side: You do not need to address both wrists simultaneously. Choose the side you are most comfortable with and work from there. Your free hand remains available for follow-up control.
Exploit psychological reaction: The technique leverages the opponent’s instinctive response when they feel one grip weakening. As one hand begins to lose control, their immediate reaction is often: “I’m losing control on one side—I need to tighten my grip on the other.” This creates an imbalance. By focusing on one side, you can effectively influence and control both arms through their own reaction.
Use directional change and structure: When you apply a quick pull (yank) followed by a reversal of direction, you are not relying on strength alone. You are using body positioning—yours and theirs—as barriers that disrupt their ability to maintain a stable grip.
Five wrist grabs with constraints
We deliberately train escape techniques for the five basic grabs under a variety of constraints and added stress. This includes scenarios such as limited space, the aggressor using their free hand to apply additional pressure, and the aggressor moving with you to disrupt your balance and timing.
We also explore positions where the aggressor keeps their arms fully extended and rigid, restricting your range of movement and reducing your options.
These variations are intentional. They are designed to build your adaptability, reinforce the underlying principles, and develop confidence in applying the techniques under less-than-ideal conditions. We will continue expanding on these scenarios throughout the season.
EXERCISES
Improving your baseline level of fitness is essential. Having physical capacity in reserve can make a significant difference, especially in unexpected or emergency situations.
In some internal martial arts communities, such as Tai Chi, there is a tendency to look down on strength training or muscle development. However, even something as simple as standing upright requires both muscular strength and coordination. In addition, resistance training plays an important role in maintaining bone density, particularly as we age.
My approach is grounded in practicality. This includes not only skill development but also maintaining health and independence for as long as possible.
A useful analogy is this: while money is not everything, there is nothing wrong with having it. You may not want to spend it carelessly, but having it gives you options—the ability to invest in things you believe are worthwhile. In the same way, physical strength and fitness provide you with choices and resilience in daily life.
I totally disagree with this generalization. Under this statement, it is easy to assume that a fight is just a fight – with or without weapon and that is a very dangerous thought. If you show up in front of the police and suddenly wave a plastic gun, it will not end good. If you assume that you can handle a knife like what is usually shown in public demos, that thought may kill you.
To understand the difference and its implications, a common steak knife is one sided and while it is sharp, it is needed to use the blade like a saw going back and forth and not intended to stab. Now, try imagine if I have a surgical knife in my hand, even an accidental touch on the tip or along the blade will get you bleeding immediately. If you bother to experiment, it can easily slice through even leather. So I ask you again, does fighting against someone carrying different type of knife matter?
Each weapon owns its own characteristics. You must appreciate the pros and cons of each to be able to defend against any.
We are starting this new season with the use of stick as a weapon potentially. So we are going through the different basic maneuvers to learn to appreciate what you can do with a stick. While this is serious business, I want you to enjoy the process of learning and ultimately, not to make “silly” mistakes.
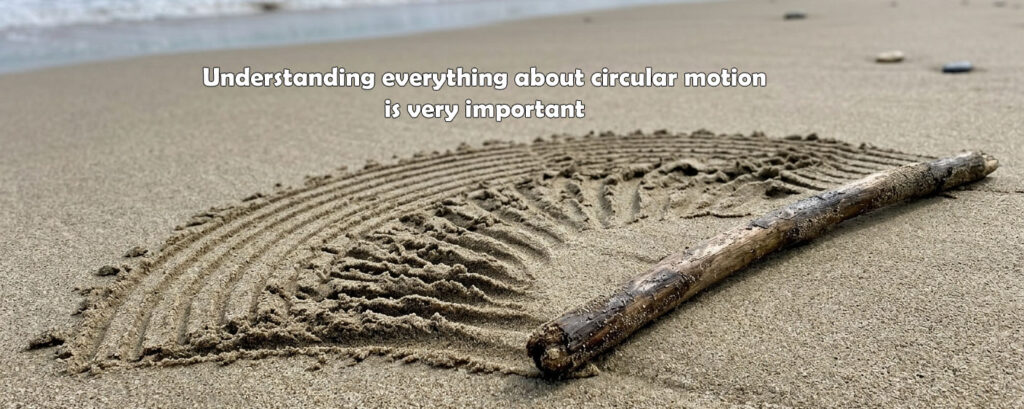
Understanding circles
When you learned about circles back in high school, you were introduced to several key components:
Center of the circle or sometimes we say pivot in context of a rotation
Radius (or diameter = 2 × radius) — the closer you are to the center, the smaller the circle
Circumference is the outer perimeter of the circle drawn
Tangent — a line perpendicular to the radius at the point of contact (similar to where a wheel touches the ground)
A circle is a two-dimensional concept. If you rotate it around an axis, it forms a sphere—a three-dimensional object.
One additional concept to consider is motion. If the circle or sphere moves in any direction, its center is no longer fixed. We now have a moving circle or sphere.
In wrist release techniques, we begin by assuming the opponent is stationary – it makes it easier to learn. However, in real life events, you must adapt the technique to account for a moving center. We will get into those practices in this season as well.
Some inherent properties of circles:
A straight line, represented by a tangent, touches the circle at a single point and then diverges away from it.
If you draw two radii from the center, the farther you move from the center, the greater the distance between those lines becomes.
A small “slice” of a circle (like a piece of pie) is simply a sector. It still follows the same geometric principles as a full circle.
These principles have direct applications in movement and combat:
When someone swings a stick at you, the closer to the tip of the stick, the higher the speed—and therefore the greater the impact. This means you have two better options: move out of range or move all the way in. Staying in place and attempting to block while the hitting stick is at full extension is often the worst choice.
Similarly, when someone throws a straight punch and you attempt to catch or control it, your chances improve the closer you are to his shoulder (the center of motion). If you try to intercept at the end of the strike, even a small movement at the shoulder translates into a large displacement at the hand, making control much more difficult.
SCENARIOS
Five single grip reviews
Again, we start with getting out from a single hand grip as the basic. The common mistakes still need more practices to get rid of.
While we learnt the basics, we need additional practices to get fluent with the extreme cases where you have not space or that your opponent is actively dragging you. To be able to adapt to different situations, the techniques have to be adaptable and flow naturally. That will take a lot of repetitions.
Wrist lock
Remember the location of the pivot and the intent is to circle around the pivot
Use body motion to amplify the amount of force you can deliver: one side goes down and the opposite side goes up.
Understand how the wrist joint works, you are exploiting the natural limits of the wrist joint.
Remember that every person is a unique individual. While the majority of people will tap quickly but there is a chance that you may encounter someone who is ultra flexible or someone who can tolerate sharp pain. So while it is important to understand your own body, this is NOT my go-to technique. I use it only when it naturally presents itself.
EXERCISES
The sticks we use are approximately 28 inches long and made of rattan. They may look like bamboo (which is hollow), but rattan has a solid core and slight flexibility, making it more suitable for training. They are typically about 1 inch in diameter.
While there is a traditional “standard,” it is important to recognize that the appropriate size also depends on your grip and wrist strength. It is better to start with a lighter stick and gradually increase the weight over time. As always, focus on developing proper technique before adding power. Your arm strength will improve naturally with consistent training. The stick is a tool to help you develop speed, strength, endurance, and grip.
In class, I provide sticks for everyone. At home, you may use any stick of similar length and shape. However, do not use it to strike anything. Make sure there are no people or animals nearby and keep a safe distance from furniture—you could easily damage something if you are not careful.
Stick Grip and Basic Maneuvers
These exercises are designed to develop familiarity with the stick and improve control.
Developing Wrist and Elbow Flexibility
Practice swinging the stick:
From high to low
Low to high
Side to side
In a figure-eight pattern
Focus on maintaining control, smooth motion, and relaxed but intentional movement throughout.
SIDE NOTES
I decided to cover some weapon basics for this spring session for two reasons. First, I am adapting to the fact that two of the students have recently undergone hip surgery. It is important to learn how to defend yourself when you are in a physically compromised situation.
I also admire their determination and commitment. Learning to persevere and adapt despite challenges is the mindset I want all of you to develop in order to gain a mental edge in survival.
Second, I believe we have covered enough foundational concepts, and it is now time to strengthen our physical execution so we can effectively carry out what we know we should do.
Muscles are important, the fact that we can stand up requires the use of muscles. However, choosing what muscles to tense up when requires a good understanding of body mechanics as well as psycho-mechanics. Today we reviewed the differences in various delivery systems like pushing with just the rear leg, initiating from the back leg and finished via the leading leg, simply sinking forward, etc.
Synchronization of body parts:
One of the most common mistakes is that each body part becomes a stand alone engine: For example, arm moved and then step and then turn is quite different from moving the fingers, stepping and turning the body all in the same beat. Yes, it does take lots of practice with a partner as well as training by yourself.
Crash Mechanics:
When your opponent loses balance and fall towards you, if you leverage off his forward momentum and your strike, you can produce a significant impact, much more than what you can produce using just your arm. You can even amplify that impact more by using your entire body behind the strike AND yanking him towards you hit.
SCENARIOS
The 5 wrist grabs and escapes review
The list of grabs are:
low across thumbs up grab
low across overhand grab
low same side grab
high across grab
high same side grab
We reviewed the escape techniques to get out and regain control without fighting muscles against muscles..
EXERCISES
Same as last week. We will be doing more conditioning and pad work next session.
SIDE NOTES
This is the last class for the winter session. I hope you have enjoyed the classes and have picked up something useful. Do practice by yourself. Will hope to see most of you back the spring session April 2nd, 2026.
This technique focuses on absorbing incoming energy and directing it into the ground rather than opposing it with muscular force. The core principle is to maintain a stable, centered structure so that the body functions as a conduit, allowing your structure to feel as solid as the ground to your partner. It requires relaxation and proper weight settling, not leaning or unnecessary muscular tension.
Projection (Thought-Based Action):
This refers to mentally extending energy and intent through the body and beyond the target (e.g., through the fingertips) without introducing muscular tension. The key idea is that the “thought must be correct before the method can work.” It emphasizes creating a continuous structural connection from the ground, through the body, to the point of contact, with the arms functioning as conductors rather than the source of force.
The Chopstick Method (Squeezing Force):
This technique applies force by compressing a target from two sides, similar to chopsticks picking up food. Rather than relying on a simple linear push, it combines inward and upward forces simultaneously, making it more effective and more difficult to counter. It is executed with the hands working in parallel as a single, unified motion.
The Log Roll Technique:
This method deflects incoming diagonal force by coordinating a twisting action through the body and arms, allowing the force to roll off to the side rather than being met head-on. The twisting action is essential; a simple lateral push is ineffective. It emphasizes the intelligent redirection of the opponent’s force rather than direct resistance.
Avoiding Common Mistakes (Leaning, Leaking, and Muscle Use):
Critical errors include leaning/tilting (breaking centered structure and balance), leaking energy (losing force due to improper structure, like lifted shoulders or disconnected arms), and overusing arm muscles. Arms should conduct force generated from the ground and body structure.
SCENARIOS
Grounding (Absorption)
The fundamental principle is to avoid force-on-force confrontation. A horizontal push allows a stronger opponent to drive you backward. Instead, “relax” to establish grounding: when external force is applied, do not resist with muscular tension. Settle your weight so the incoming force is transmitted through a stable, untensed structure into the ground. In this way, the body becomes effectively rooted.
Avoid leaning—once your center moves beyond your base of support, stability is compromised and you become easy to unbalance. The correct response is to relax, absorb, and direct the force downward. This causes the opponent to feel as though they are pushing against the ground itself, rather than your body.
“I’m not going against you… I’m just redirecting the energy to the ground so that you are fighting against the ground.”
When you feel as though you are losing balance, relax further. That sensation often indicates residual resistance—an attempt to oppose the force rather than settling into the ground.
Projecting (via the mind)
This method uses mental intent to produce a physical effect: visualize energy flowing from the ground, through the body, and projecting outward through the fingertips, extending beyond the target. This intent organizes the body structurally, creating strength and continuity without overt muscular tension. The arms function only as conductors, transmitting force from the true engine—the connection between the ground and the core.
With correct intent, the structure remains stable and integrated, even when standing on one leg. Relying on the arm muscles, however, introduces a weak link and breaks the connection. For example, if the arm extends without affecting the partner, it indicates that the structural link to the core and ground has been lost.
The process can be described as “relax into it and maintain the intent.” It is challenging because it runs counter to the instinct to rely on muscular effort and contradicts conventional training habits. However, as demonstrated, it is both effective and consistent with the body’s actual structural state.
EXERCISES
I’ve noticed that some of you may not be clear on the purpose of each exercise. Please feel free to ask at any time. Ultimately, if the goal of an exercise is unclear, it’s unlikely that you are maximizing its effectiveness.
SIDE NOTES
This week we held class at the Banquet hall because of a schedule conflict with a kids camp because of spring break. Note that the last class will be held at the same Banquet hall just down the hallway.
I have posted a new video on my YouTube channel. Do check it out.
This is a core concept in power delivery: using the body’s skeletal structure is more efficient and powerful than relying on isolated muscle tension. It involves relaxing unnecessary muscular effort and aligning the body so the structure forms a solid, stable frame. When done correctly, force can be delivered effectively without a high degree of muscular exertion or commitment.
Hit AND Control as Defense:
This is an aggressive philosophy in which defense is embedded within an offensive action. Instead of performing a passive block followed by a separate attack, the goal is to respond to a threat with a simultaneous block-and-strike as a single move. By always moving forward and targeting the opponent, you seize the initiative and reduce the opponent’s available options.
The Jab vs The Cross:
These are two fundamental types of punches. The jab is delivered with the front arm while the front leg is forward, and it is often used to gauge distance and timing. The cross is thrown with the arm opposite the forward leg (for example, a right punch with the left leg forward). Because it involves greater body rotation, it is typically the more powerful punch.
Self-Defense Strategy:
Do not start a fight unless you are fully prepared to finish it—whatever it takes.
Do not fight over things that are easily replaceable; it is simply not worth it.
Do not fight because you are angry and want to teach someone a lesson. There are many foolish people in the world, and you cannot teach them all.
Fight only if your life or the life of someone you love is in danger. Act if someone who cannot defend themselves is being harmed.
The core purpose is to handle physical confrontations when escape is not possible. The key principle is to avoid fights whenever you can by using situational awareness to recognize and evade troublemakers before a conflict begins. If a confrontation cannot be avoided, remain calm and make strategic decisions. Understand your disadvantages, avoid panic, and use practical measures—such as staying with others rather than being alone—to improve your safety.
SCENARIOS
Hitting with “Relaxed” Power
Muscle tension is not always productive. Any extra energy you expend produces no return if it never reaches the target. The “relaxation” we are referring to is technical relaxation—not limpness or lack of intent.
In practice, the arm is extended with clear intent but without unnecessary muscular squeezing. Hands-on experiments can help you feel the difference between extending the arm with intent while remaining relaxed, versus tightening the entire body during the strike.
This concept should be tested with both the jab and the cross.
EXERCISES
Always keeping yourself in good physical condition is a necessary attitude for self-defense. At this point of development, do work on the following:
Cardio
Strength
Mobility to move in, move out or move sideways easily and efficiently
Coordination so that you can get your body to act as ONE.
This foundational stance is a “seated” position with the back leg bent (about 30–45 degrees), forming a stable triangular base. It is often referred to as the “4–6 stance.” The key is to generate forward force by driving the hip forward and collapsing this triangle, rather than leaning or pushing with the front leg. This allows power to transfer efficiently from the back leg through the body without leakage.
Pushing vs. Displacing
These are distinct actions. Pushing is the conscious, sustained application of pressure to move an object. Displacing is taking an object’s space, often through whole-body mass and impact rather than a focused push.
In displacement, the resulting direction of the object or person is often different from the direction of your exertion. For example, if I sit down and my body glances off a ball on the chair, the ball is displaced even though I did not intend to push it.
In a push, the direction of your intent is the same as the resulting movement.
Synchronized Movement and Structural Integrity
Effective power requires the entire body to initiate together while maintaining its “shape.” Joints are common points of leakage. Think of “expanding” the whole structure slightly (e.g., half an inch) as you drive the hip forward, keeping the joints under tension so the force reaches the contact point without delay, telegraphing, or dissipation.
Isometric exercises at home
Practice hip drive against a static object (e.g., a wall) as an isometric drill. Isometric means training the muscles without visible movement; a plank is a good example of this type of exercise.
In this drill, any movement in your body—other than the pressure you feel at the contact point—indicates force leakage. Aim to feel drive and internal tension without visible external movement, keeping the entire structure solid.
Is This Movement Correct? (It Depends…)
This question usually focuses on how something is done. However, how something is done depends on what you are trying to accomplish.
In class, instructions are often given within a specific context, and certain assumptions are implied. A particular way of doing something should not be interpreted as “you must do it like this all the time.”
Instead, you need to understand the reasoning behind the method so that you can adapt and apply it appropriately for the situation.
SCENARIOS
3 type of pushes
Depending on what we are trying to accomplish, there are different ways to apply a push. For example:
1. Horizontal push without level change Focus on hip drive and the synchronization of the hands with the whole body to eliminate any “leaks” in the structure.
2. From standing into a sitting stance Instead of bending the legs and sitting down before reaching out with the lead leg, perform the actions simultaneously. Shift the center of gravity forward while lowering it, resulting in a downward diagonal line of travel.
3. From sitting into standing while the center of gravity is between both legs Bringing the back leg beside the front leg is impossible without adjusting the center of gravity. This upward diagonal movement is an effective way to absorb and apply pressure at the same time.
Is the above the complete list? No, there are a lot of situations and therefore a lot more HOWs which you will learn over time.
EXERCISES
Isometric Practice for Structural Integrity
Practice and test your alignment by pushing against an immovable object, such as a wall, to check whether you can maintain a stable power train. Any yielding — such as sitting down first, collapsing posture, or bending at the elbow — indicates a leak in power transmission.
This is an isometric exercise, similar to a plank, where the muscles are engaged to maintain a static position while preserving structural alignment and full-body connection.
Do get some cardio into your daily exercises. What are some of the options taught?
We are trying to experience how to generate power, and we begin with a push. The most common mistakes in pushing are:
Pushing with just the arms
Leaning in with the upper body to push
Leaking power in the lower back by arching backward or allowing the arms to retract during the push
Hands and body not moving in sync. For example, even though you start in a “seated” position, if you straighten the leg before making affecting your opponent, you end up telegraphing your intention and can be dangerous.
You should focus on using body structure, not just muscle, to generate force in a pushing motion. Muscles require reaction time and fatigue with prolonged exertion. Structure, on the other hand, allows force to be transmitted efficiently without unnecessary tension.
Maintain a vertical posture, bend the back knee to sit into the stance, then straighten the back leg to drive the force forward while keeping the body aligned and in the same shape. The “locking” of the joints allow structural force to be transmitted efficiently.
Timing & Coordination (Hand-Leg Sync):
Synchronizing the arms and legs is challenging because they travel different distances and operate at different mechanical speeds.
To achieve proper coordination, initiate the arm movement a fraction of a second before the leg drive — think of it as a “half-inch” head start. This slight pre-activation establishes the connection through the body structure. The subsequent leg push then reinforces and powers the already-initiated arm movement.
When timed correctly, the leg drive does not chase the arm, and the arm does not act independently. Instead, the leg supports and amplifies the motion that has already begun, resulting in effective structural synchronization and efficient force transmission.
Elbow Strikes
Elbow strikes are primarily used at close range. However, they offer the advantage of being a very solid striking tool with a low risk of self-injury compared to extended strikes. Because of their short reach, you typically need a “lead” action before the strike to conceal the act of closing the distance.
For example, you may escape from a wrist lock and use that brief moment to pull your opponent toward you, then follow up with an elbow strike to the face. Today, however, the emphasis is only on developing the correct feel for the strike itself.
Elbow strikes can generate significant power when the whole body is engaged. According to Newton’s Law of Action and Reaction, the shoulder must be structurally strong — in both muscles and ligaments — to withstand the reaction force produced upon impact.
The tip of the elbow is a small and pointed contact surface. This means the same amount of force is delivered over a much smaller area, resulting in greater pressure at the point of contact. As such, this strike should be developed progressively over time, as the body needs to adapt physically to handle the load safely.
Common mistakes:
Leaning into the target instead of maintaining relatively upright structure
The front knee and hip retracting during the hip rotation due to using the wrong axis of movement.
Keeping the front foot static during the strike, which limits the strike to rotational power only. To maximize whole-body force, the front foot should step or stomp forward so the body mass is committed into the target.
SCENARIOS
We worked on the delivery system this week with the intention of linking it back to all the techniques learned so far. Up to this point, you have learned three types of attacks:
A horizontal push can also cause significant damage. For example, pushing someone into traffic or causing them to fall and hit the back of their head on the ground can lead to serious injury.
The elbow strike is short in range but highly powerful. When you are too close to the target for extended strikes, it becomes an effective weapon.
The continuous blitz is designed to overwhelm your opponent. Maintain forward pressure and do not stop until the opponent is no longer a threat or has disengaged and retreated.
EXERCISES
Isometric Practice for Structural Integrity
Practice and test your alignment by pushing against an immovable object, such as a wall, to check whether you can maintain a stable power train. Any yielding — such as sitting down first, collapsing posture, or bending at the elbow — indicates a leak in power transmission.
This is an isometric exercise, similar to a plank, where the muscles are engaged to maintain a static position while preserving structural alignment and full-body connection.
SIDE NOTES
This is our YouTube channel, it includes material from Functional Fitness but the ideas and principles apply to self defense as well.
Registration for Burnaby starts March 2nd. There will be no summer session, so students should attend the spring session instead of hoping to join the summer session..