SSD – Class notes 2026-05-21 Bonsor

DISCUSSION

Off Topic

I apologize for the late notes. Two things happened: my recorder ran out of battery, and on top of that, I was heading off on holiday the next day, so I didn’t have time to write everything down before I left.

Anyway, the bird photo above is one of the special birds I photographed during my trip to Alberta—a White-faced Ibis. I had never seen one in full breeding plumage in person before. In the Lower Mainland, they don’t show up often—maybe once every few years—and when they do, they are often juveniles, meaning they haven’t developed their full coloration yet.

Birding has taught me patience, as well as an appreciation for the laws of nature. I have seen hummingbirds harass eagles many times their size. I may have the best plans and intentions, but if a bird doesn’t show up, there is nothing I can do on that trip. Sometimes it’s not movement itself that scares birds away, but changes in movement patterns that trigger their danger-detection system. I’ve also learned that with advances in digital photography, you need to maximize and take full advantage of those moments.

Last but not least, I’ve learned to make use of every opportunity in front of me instead of thinking “it can wait”—because opportunities often fly away.

Now, how is birdwatching related to self-defense? Give that a try. 🙂

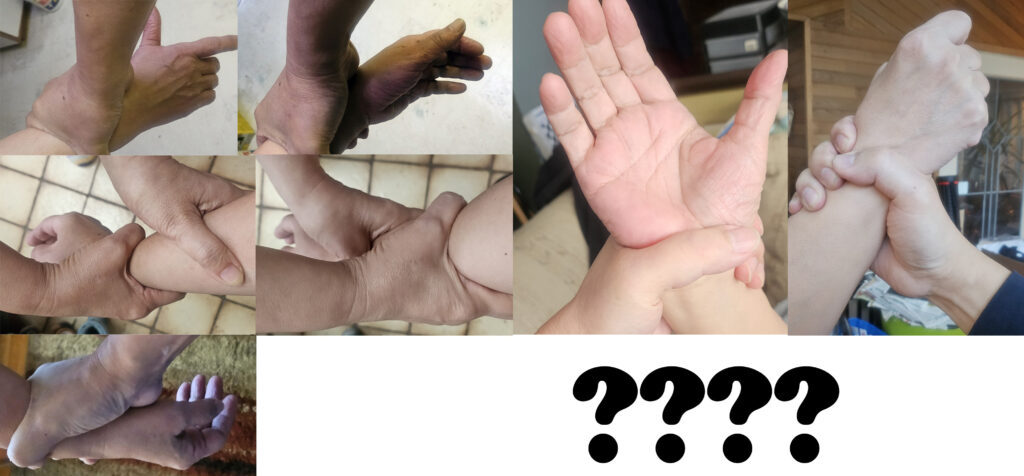
Technical Tension vs Technical Relaxation

We’ve talked many times about the need to relax in self-defense. However, that’s not how most of us have been conditioned throughout our lives. We lift weights, arm-wrestle, play tug-of-war as kids, and instinctively “try harder” when things aren’t working in our favor. It’s easy to assume that fighting effectively depends on muscular tension. Obviously, that’s not true.

Relaxation is not the same as being limp like overcooked spaghetti. Technical relaxation requires precision. It involves knowing which body parts should move and which should remain stable, where your focus should be directed, and how to maintain proper structural alignment.

If there is such a thing as technical relaxation, then there must also be technical tension. The projection technique we covered in class is a good example. It is relatively easy to learn, but more importantly, it allows you to experience the difference between relying purely on muscular effort and using an efficient mechanical system—one where both muscle and intent work together.

Rest/ Restore Cycle

When I was training for triathlons and marathons in my younger days, one of the toughest lessons I learned was the importance of proper recovery. At first, I believed that pushing harder and “toughing it out” was the key. Very quickly, I found myself becoming more susceptible to colds and flu when I didn’t allow enough rest.

We learned to build in structured recovery cycles. This included small “breaks,” where we reduced training volume or intensity once a week, and a more significant break once a month—a full day of complete rest. This approach kept me much healthier and improved my overall performance.

Let me explain what I mean by “small breaks.” In triathlon training, you have three disciplines to manage. It’s unrealistic to train all three at high intensity every day. Instead, we would focus on two disciplines per day. On the following day, we would rotate—training the third discipline more fully while reducing load on one of the others. We also varied the focus within each discipline, such as working on speed versus efficiency. What works best depends on the individual, but the key principle is variation to keep both the body and mind fresh.

What is active rest?

Rest doesn’t mean sitting on the couch all day. It means allowing both your body and mind to recover by engaging in something different and enjoyable. Active rest is a planned reduction in training intensity while maintaining light movement to support recovery without complete inactivity.

Examples include going to the beach and casually throwing a ball, playing on a water slide with family, enjoying a light game of tag with grandchildren at a park, or even participating in a relaxed social dance. The specific activity doesn’t matter—what matters is that it’s enjoyable and low stress.

I also use active rest as part of recovery after illness or surgery to gently reintroduce movement. The goal is to increase blood circulation without causing fatigue.

For seniors, depending on individual condition, incorporating active rest once or twice a week can be very beneficial. It helps maintain consistency while ensuring that training does not become a chore.

SCENARIOS

Shoulder shrug push

This exercise is designed to help you experience the difference between passive relaxation and functional (technical) relaxation.

On one end, there is the “limp” type of relaxation, where structure is lost and power cannot be transmitted effectively. On the other end, there is excessive tension—stiffening the shoulders and arms in an attempt to generate force—which often restricts movement and reduces efficiency.

The goal is to find the middle ground: allowing the shoulders to relax and move forward naturally while maintaining the structural integrity of the body and arms. This prevents “leakage” of power and enables force to be transmitted efficiently through the entire body.

By comparing these three states—limp, tense, and technically relaxed—you can better understand how to generate power without unnecessary effort.

EXERCISES

Remember to work hard and yet make sure your body do get some active rest once or twice a week.

SIDE NOTES

Tug-of-war may seem like a pure test of muscle power—the most direct form of strength against strength. But if you look closely, technique plays a critical role, and small details often determine which team wins.

Can you see it?

It’s not just about pulling harder. It’s about body alignment, timing, coordination, and how effectively each person connects to the ground and to their teammates. Teams that move as a single unit, maintain structure, and apply force efficiently will often outperform stronger but less coordinated opponents.

Even in something as simple as tug-of-war, technique matters.

SSD – Class notes 2026-05-14 Bonsor

DISCUSSION

Knowing is not enough

Look at kids practicing table tennis at a competitive level. They repeat the simplest movements over and over again. Watch the video above.

Self-defense is not a sport—but doesn’t that make it even more important to invest time in repetition, so that your trained responses become automatic?

I want you to stay curious, to enjoy the process of practice, and to notice the improvements that come over time.

Our method of self-defense may seem simple and logical. However, it is not how you have been operating for most of your life. As we age together, we need to do things differently and learn to compensate for the changes in our bodies.

Using an Opponent’s Reflexes

Exploit natural reactions to trap or control an opponent. Create scenarios where their instincts, such as tightening a grip or pulling back when pushed, work in your favor. When done correctly, their response helps complete the technique, allowing you to use less effort and achieve greater control.

Common mistakes of stick maneuvers

  • Wrist flipping – Flipping the wrist during a strike can misalign the weapon. If the stick were a blade, you would be cutting with the back edge instead of the edge itself. Maintain proper alignment throughout the strike.
  • Dropping the arms too low – This is a very common mistake. As your arms drop, you lose reach and structural integrity. Instead of lowering your arms, lower your body by bending at the knees and hips.
  • Failing to “park” the stick after a strike – Recovery is critical. If the stick is not properly controlled after impact, you can easily lose structure—or even strike yourself. Build the habit of returning the stick to a controlled, ready position after every action.
  • Remaining stationary during strikes and defenses – Keeping the body and footwork static limits both power and safety. Movement is essential—not only to generate force, but also to reposition yourself and avoid becoming a stationary target.

SCENARIOS

Review of the escapes from the 5 basic grips

It is important to remember the five basic grips, as most other techniques are simply extensions of them. At this stage, many of you still hesitate when being grabbed. In addition, it often takes more than one attempt before you can recall and apply all the key points correctly.

This is a natural part of the learning process. You simply need enough repetitions to truly own the technique. It is also important to train with different partners, each with different body types, timing, and reactions.

Do not be afraid, frustrated or embarrassed. It can be solved. Arrive a bit earlier if possible to experiment, and ask questions whenever needed.

Extending What Was Learned into Different Situations

The five basic grips provide the foundation for handling a wide range of other grip variations. From there, we experimented with the following scenarios:

  • Two-arm grip from the opponent with their arms crossed
  • Two-arm low grip on both wrists in a natural grip
  • High two-arm grip against both wrists with upward pressure
  • Face-to-face position with an elbow grip
  • Side-by-side position with a wrist grip

While these situations may feel new, the solutions are based on the same concepts you learned from the five basic grips. Try to determine the appropriate response by recalling those principles and applying the underlying mechanics from the other techniques.

EXERCISES

All exercises taught, whether using body weight or a stick, should be practiced to improve strength and stamina. Everyday tasks often require only specific parts of the body to move and over time, this becomes a habit. We frequently rely on just our arms to lift heavy objects, which is why workplace safety guidelines (such as those from WCB) emphasize using the legs instead. Once you are used to the new way, it becomes your new habit.

Similarly, when pushing a person or resisting force, many people rely primarily on their arms instead of driving power through the legs and body into the arms. To change these habits, these mechanics must be trained as life skills—not just as a Thursday class exercise.

SIDE NOTES

T-shirts should be ready coming Thursday. If everyone is there, we should take a group picture!

SSD – Class notes 2026-05-07 CSC

DISCUSSION

Walking Mechanics and Butt/Foot Engagement: Walk purposefully. Push through your toes to engage the gluteal muscles and stabilize the foot and ankle. Avoid flat-footed steps; instead, use the same amount of time (e.g., 20 minutes) more productively by emphasizing toe push-off and maintaining a steady cadence.

This is especially useful if you already walk regularly. It improves the efficiency and exercise value of each step you take. An additional benefit is that you will naturally walk faster without consciously increasing your pace.

Fall Prevention and Relaxation: Fall Prevention and Relaxation: People fall because they tense up. They try to STOP the fall instead of going with the flow force.. When lightly pushed/pulled on the shoulder and space allows, all it takes is to step with the flow forward/back/side to rebalance.

Relative Distance: Some of you may have already noticed that when the wrist grab is strong and the attacker is pulling while walking backward, the technique feels more difficult. If you move with them and maintain the distance between you, the contact on your wrist remains stable. Therefore, you simply have to keep up so that the distance between you does not change.

SCENARIOS

Escape from frontal elbow grab across center line – Treat it like the low crossover wrist grab where you simply draw around the opponent’s wrist. In this case, you will put your entire forearm over past his forearm and then relax downward.

Escape from elbow grab from your side (his right hand to my left elbow) – Use shoulder-to-shoulder turn and walk the opposite way. While a different body part is grabbed, the concept is the same as the “same-side low grab”.

EXERCISES

Having a strong physical foundation is important for health as well as for self defense. This represents your “resources” in the LRT model. You not only have to do the best you can to retain what you have but you need to train your eyes and brain to be able to see and work within that context.

For example: Do you have ways to deplete your opponent’s resources while preserving or amplifying your own? Do you know how to take advantage of your environment so that it works in your favor?

There are still lots to explore!

SIDE NOTES

Yes, today is the last class of the early spring session. We have also added a new 4-class session to the calendar, running from June 11th to July 2nd.

In this upcoming session, we will continue to explore efficient movement in a self-defense context, how to generate and deliver more power, and spend more time reinforcing the skills you have learned until they become automatic. Hope to you in the next session and please pass the word around, we need at least six participants minimum.

If I don’t see you, enjoy a great summer! Stay safe!

SSD- Class notes 2026-05-07 Bonsor

DISCUSSION

Stick as a weapon

Stick as a Weapon

A stick, with the amplification created by its whipping action, is extremely fast and elusive. Therefore, you must focus on “moving the target” rather than standing in one place and attempting to block the attack.

Muscles are meant to protect the bones, and make no mistake—being hit on any part of the body hurts. However, strikes to areas with less muscle protection are significantly more damaging. Commonly exposed or “unprotected” areas include the fingers, knuckles, elbows, knees, shoulders, collarbone, neck, ribs, and head. When struck at full speed with a stick, bones in these areas may crack, potentially immobilizing the attacker and forcing them to release their weapon.

Footwork

When training in bare-handed self-defense, many people remain static and rely on arm strength for both attack and defense. However, once weapons are introduced, this approach quickly proves inadequate. The speed and elusiveness of a stick demand mobility.

You must learn to evade, duck, lean, tilt, and keep your steps constantly active. Even if you never engage in stick fighting, this type of training builds strong movement habits that carry over into all aspects of combat.

When moving to the side while striking, aim for approximately a 30-degree angle off-center rather than a convenient 45-degree angle. At 45 degrees, you have not truly closed the distance. A slightly forward-biased angle allows you to both advance and generate more forward force through your step, enhancing the effectiveness of your strike.

Picking Targets

There are similarities yet important differences between bare-hand self-defense and stick or weapon-based fighting. Two of the most critical differences are distance management and target selection.

You must maintain a greater distance due to your opponent’s potential reach advantage. At this longer range, it becomes easier to adopt a “sniper-style” approach: strike, then disengage. This allows you to frustrate an opponent who does not share the same reach.

In bare-hand situations, targeting the opponent’s hand typically does not cause sufficient damage to stop them. However, with a stick, accuracy and speed can make hand targeting highly effective. A quick, forceful strike to the weapon-holding hand—especially the knuckles—can be enough to disarm your opponent.

SCENARIOS

First Disarm Technique

It seems like it is quite complex when you try to the entire move all at once. So we break it into parts. Your opponent is doing a number one strike to your left elbow:

  • Block and swipe under his arm to strike at his arm or ribs while left hand grab his stick sliding close to the end of his stick, right after the block
  • Snake the stick from under over and across opponent’s forearm forming a cross over his forearm
  • Left hand swipe down and around in anti-clockwise, while right hand lift the butt side up slightly to create a pivot point. The resulting leverage will force him to let go of his stick and now you have both stick.

EXERCISES

Swinging the stick is important. You must practice also the stepping, the evasive moves, the level change.

Try to see what you can salvage from memory about the disarm. .

SIDE NOTES

Aside from teaching Seniors’ Self-Defense, I also have a group of students who practice LiuHeBaFa—the martial art I consider my “home” style. As part of our training, we practice push hands to develop sensitivity and refine body mechanics.

We competed in Richmond on May 9th. You can read more about it on Facebook—find me at MartialGym Facebook Page or visit the club’s page at LHBF MartialGym Facebook Page.

SSD – Class notes 2026-04-30 CSC

DISCUSSION

Situational Awareness, Space, and Time Management:

One cannot label a specific situation as simply good or bad. What truly matters is the relative difference between you and the aggressor—your surroundings, the distance between you, the availability of potential help, your level of mental and physical preparedness, and, perhaps most importantly, whether you can detect early signs of trouble. All of these factors influence your chances of success or survival.

I don’t want any of you to become skittish or constantly nervous, as if there were an attacker right behind you all day. However, setting aside some time each week to sit on a street with a coffee and engage in people-watching can be both enjoyable and beneficial. This is what I call “training your eyes,” or the “L” within the LRT model.

Some examples of what to observe include: What does a confident person look like? Among the people around you, who appears more likely to be targeted? In a group of teenagers, who is the leader, and who seems most aware of their surroundings? What can you infer from people’s walking mechanics and posture? For example, among seniors, can you identify who may be starting to have balance issues? Finally, if you needed help, who would you choose to approach?

Boundary-Setting and positioning:

When someone walks aggressively toward you and begins yelling, should you back away to maintain distance? I recommend moving laterally rather than straight back. Retreating directly backward can signal submission and may encourage the aggressor to continue advancing.

Maintain a discreet guard by using natural, non-threatening movements—such as touching your face or scratching your neck—to position your hands without escalating the situation.

Use loud, clear verbal commands and simple narration (e.g., “Stay there,” “I’ve already called…”) to establish boundaries. This not only communicates your intent but can also draw attention from bystanders and help clarify who the aggressor is.

Strategic positioning

During wrist-grab escape drills, I always remind my students not to stop immediately after the escape. You must step and reposition yourself strategically. Furthermore, maintaining a relaxed demeanor—such as a slight smile—while repositioning and applying follow-up techniques can help keep the confrontation at a more controlled, civilized level.

Avoid standing directly in front of the aggressor in a confrontational manner, as this increases the risk of a follow-up grab or strike. The “step to the side and place a hand on the shoulder” method serves a clear strategic purpose. A face-to-face position is often perceived as confrontational, whereas aligning your body in the same direction and verbally redirecting the person’s attention can create a subtle psychological shift. This may encourage them to reconsider their intent or disengage altogether.

Body Mechanics and Structural Leverage

As we age, relying solely on muscle strength means depending on a diminishing resource—it is not constant over time. Physical condition can also vary from day to day. Even if you are strong compared to others of a similar age, an adversary may target you precisely because they are younger, stronger, or faster.

To protect yourself with a reasonable chance of success, you must make use of everything that contributes to your overall strength. Beyond muscular power, this means applying proper body mechanics to maximize efficiency and structural leverage.

Equally important is maintaining a calm, adaptable mindset. The person you are facing will likely be very different from your regular training partner, and your ability to relax and adjust in real time is critical.

How to Overcome Reach Challenges

If the aggressor is taller and has longer arms, you will need to find ways to close the gap in order to access effective targets. While they clearly have a reach advantage, there are still practical strategies you can apply:

Relax and allow your shoulder to rotate naturally with your punches or strikes. This can add several inches to your effective reach without compromising balance.

Although your opponent’s arms are longer, that length can also work against them. With proper leverage and timing, you can still affect their structure efficiently once contact is made.

While the legs can provide greater reach than the arms, I have strong reservations about recommending kicks for seniors unless they have trained them extensively. Many seniors already face an increased risk of falling, and striking with one leg while relying on the other for balance introduces unnecessary risk.

Use positioning and timing to your advantage. Creating an opening—whether by appearing less guarded or by controlling distance—can prompt the aggressor to overcommit. This can give you a brief window to act decisively.

Lowering your level can sometimes draw the aggressor downward. When they lean in, they may enter your effective range, allowing you to engage more safely.

SCENARIOS

Grip Releases

Most Common Mistakes in Escape Drills:

  • One of the most common mistakes is failing to assess the situation at hand and instead mechanically applying a technique that may not suit the context..
  • Another frequent error is resisting the grip with brute force in an attempt to overpower it. Learning to relax and think under pressure is often more difficult than simply imitating movements. However, this ability can be developed through repetition, understanding the underlying mechanics, and applying them adaptively. True adaptation must become a trained instinct, which takes time and conviction.
  • Resisting directly at the contact point and forgot gain the leverage and power through separation of moving parts and non-moving parts..
  • You must also understand the structure of the grip itself. If you allow the thumb’s structural support to remain intact, you are effectively working against the strongest part of the grip. If you can disrupt that structure, escaping becomes significantly easier.
  • In everyday life, we are accustomed to gripping objects by closing our fingers inward, which makes that direction naturally strong. Attempting to pry the grip open directly requires considerable effort. However, if you apply pressure inward against the fingers, the grabber must resist outward—something most people are not prepared to do effectively.
  • Finally, when we “press,” we should not rely solely on hand or arm strength. Instead, aim to transfer your entire body weight into the point of contact. This creates far greater force and efficiency than using the arms alone.

EXERCISES

Plank is a good exercise that exercise the whole body. Do make sure you are doing it correctly to avoid injuring yourself.

SIDE NOTES

SSD – Class notes 2026-04-30 Bonsor

DISCUSSION

Why Practice with Sticks?

Many people first encounter sticks as simple objects for play. However, learning to use a stick goes far beyond fun or fighting.

Training with a stick is an engaging way to develop hand-eye coordination. It also serves as an effective tool for building strength in the hands and arms. Because of its simplicity, it is a convenient training implement that can be used almost anywhere.

With proper practice, you begin to appreciate the amount of power a stick can generate. While others may underestimate a person’s empty-hand striking ability, they tend to be far more cautious when a stick is involved—especially in the hands of someone who appears skilled.

Because a stick can move quickly, it becomes especially important to develop mobility and the ability to reposition both yourself and the target.

A stick is also one of the most accessible tools you can carry or find in everyday environments. However, it must be treated with respect. As the saying goes, “Do not take it out unless you intend to use it.” Use it responsibly and with control—never carelessly or abusively.

Basic Striking Patterns and Strikes

The stick skills taught here are derived from Filipino Arnis, simplified to make them easier to learn, retain, and apply.

There are two primary types of strikes:

  • Snap (or knock): The stick recoils immediately upon contact with the target. These strikes are used to stun or distract. When applied to sensitive areas such as the opponent’s fingers, they can cause them to lose grip of their weapon.
  • Follow-through (hit and swing through): Similar to swinging an axe, the strike continues through the target. This generates heavier impact and delivers more force.

The following are the fundamental movement patterns:

  • Diagonal patterns: Letter X (or figure-eight), performed in both natural and reverse directions
  • Helicopter / fan (abanico)
  • Horizontal strikes
  • Vertical strikes (downward and upward)
  • Thrusting (stabbing) actions: using the front end of the stick (dulo) or the butt end (punyo)

The Stick Grip and Handling

The stick should not hang loosely from the arm, but it also should not be gripped too tightly. Maintain a balanced grip—secure enough for control, yet relaxed enough in the fingers and wrist to allow the stick to whip through the air. If your grip is too tight, you will restrict speed and fluidity, making it difficult to generate proper snapping motion.

Although a stick does not have a cutting edge like a blade, the system is based on the idea that the same mechanics can translate to edged weapons. With that in mind, align the second joints of your fingers as if they represent the cutting edge, always oriented toward the target.

After each strike, you should “park” the stick in a controlled position. This builds the habit of always knowing where your weapon is. While it may seem minor, poor control can cause the stick to rebound unpredictably potentially resulting in self-inflicted contact or accidental injury to others nearby.

Your non-weapon (guard) hand should remain active at all times unless performing a specific action. Keep it positioned in front of your chin or neck, facing outward, ready to protect or assist as needed.

Numbering System for Ease of Reference

Having a numbering system is both good and bad. Once you repeat it enough times, then it is not a problem. However, it is a problem when there is more than one numbering system. To switch between the different system will be very confusing.

I am teaching sticks to seniors and I don’t want to over burden them with complexities that doesn’t offer a lot of value unless they are planning to live and breath it and make it their profession.

So our simple system is always from the striker’s point of view. Right are all odd numbers and even number is the left. We will simply start with 4. One is high-right. two is high-left, three is mid-right, four is mid-left. We will add more over the weeks.

SCENARIOS

Partner overhead helicopeter drill

This drill develops coordination between the elbow, body movement, and an overhead wrist-driven strike. The goal is to generate a controlled “flicking” motion from above.

Maintain visual focus on your target at all times. Your partner will hold a stick upright as a reference point. Aim precisely and strike the target using the overhead helicopter motion, ensuring the movement is driven by proper body alignment and a relaxed, snapping wrist rather than excessive tension.

Practicing the Strike (Power, Distance, Angle, and Guard)

Developing strength in the arms, wrists, and hands is essential and will improve over time with consistent practice. Repeating the basic striking patterns with a stick helps build the necessary attributes.

Provide a smaller target by tucking in your chin, rounding your back and bending the knees and facing your opponent at a slight angle. Stick are fast because of the amplification of the hand and body speed through the arc of travel.

A common beginner mistake is relying on just the arm for power while maintaining a stiff body and shoulder. Instead, allow the entire body to contribute to the strike. Power should originate from the hips, not from twisting the waist in isolation. As the hips rotate, one foot should turn with the knee and pivot on toe while the other side provides a stable anchor and stay grounded.

Proper distance and angle are also critical. If the target is low, adjust your level by lowering your body so your shoulder is closer to the height of the target. If the target is high, avoid simply reaching upward with your arms. Instead, raise your body so the stick remains closer to a horizontal line. This is important because your effective reach is greatest when the arm and stick are aligned horizontally; reaching too far up or down reduces both reach and structural efficiency.

Level changes can also be used as a tactical tool. You can feint high and then quickly change levels by rising or dropping your stance. Combined with stick speed, wrist-driven redirection, and footwork adjustments, this makes your strikes significantly more difficult to anticipate and defend.

Always remember the importance of controlling the “blade edge” throughout the entire strike, right up to the moment power is delivered to the target.

A common beginner mistake is rotating the wrist too early, causing the strike to land with the “back side” or at an inconsistent angle. This misalignment reduces effectiveness and can cause the stick to glance off or lose control upon impact.

Maintain awareness of your guard hand throughout, ensuring it remains active and ready unless intentionally committed to another action.

EXERCISES

Do all the body conditioning drills plus work on the stick moves so that it is not foreign to you. Use the whooshing sound as feedback to know if you are striking with acceptable speed. Furthermore, add the following variations:

  • Level changes
  • Zigzag steps forward and backward

SIDE NOTES