SSD – Class notes 2025-10-30

DISCUSSION

Learning through visual vs understanding

In today’s class, we reviewed two basic moves:

  1. Low cross-over, thumbs-up grip
  2. Low same-side, thumbs-up grip

Some of you recalled how the moves look, but many missed the key points that make them work. Similar-looking movements are not always the same. Don’t just copy the motion—focus on applying the key principles so you can adapt to different but similar situations.

(If you forgot what the key-points are, review the notes from a couple of weeks ago and think of the phrase “Please Practice Relax First“.

Creating your own summaries

Someone suggested having a summary of the key points for each technique. I understand the idea, but that only helps on the surface. The real value comes from reviewing and processing the material yourself. When you jot down notes after class, read my notes, compare, reflect, and write your own summary, you activate your memory. By revisiting them multiple times, you don’t just learn one skill—you internalize a reusable concept that can be applied in many situations.

Best technique

When people begin martial arts, they often expect a one-to-one match between a specific attack and a specific defense. In reality, it doesn’t work that way.

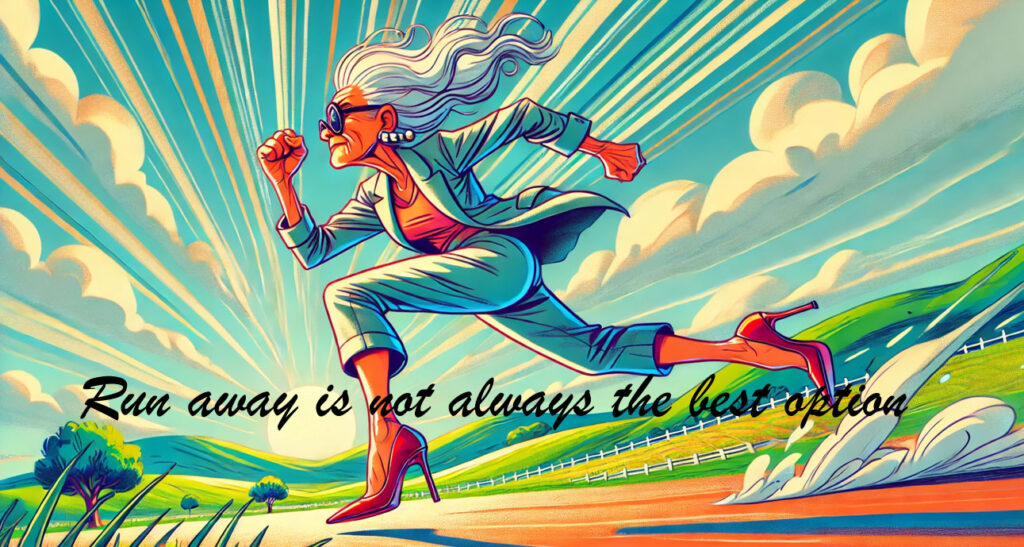
For example, there’s an old Chinese saying: “Of the 36 techniques, running away is the best.” But even that isn’t always true. What if the aggressor is younger and faster? What if your knee hurts that day? When was the last time you actually sprinted—and are you sure you won’t cramp up? Are you even warmed up to run? And what if you’re in an elevator with nowhere to go? Do you have the right shoes?

Asking Questions

When we were in school, the teacher or professor always seemed so knowledgeable, often asking questions that left us stumped. But remember—because they’re the ones doing the testing, it’s natural that we eventually miss something. If we were to question them in return, they might not have all the answers either.

In self-defense, the same idea applies: it’s important to be proactive rather than passive. Taking initiative can disrupt your opponent’s plan and make them reconsider their actions.

SCENARIOS

How to block a punch?

Remember, blocking should be your last resort, not your preferred option. We can break blocking into three key phases:

  • Noticing the Attack – You can’t defend against what you don’t see or feel. Train your awareness to recognize incoming threats early.
  • Before Contact – Once you detect an attack, there’s a brief reaction delay before your body moves. The time it takes for your hand to reach the target depends on both speed and distance. This is “overhead” time—it has no effect until contact occurs. To shorten this delay, keep your hands ready and avoid placing them in your pockets or behind your back.
  • At Contact – You won’t know your opponent’s strength until the moment of impact. Stay adaptable and responsive.
  • After Contact – Don’t rely on brute strength to move the opponent’s arm; strength against strength is inefficient. Instead, redirect or guide the incoming force away from your body. At the same time, move your target area—every inch of movement creates more space and safety

EXERCISES

Gallops

As kids, we all pretended to be horses and galloped around the playground. We’ll use that same idea for this mobility exercise.

  • Moving forward: Push into the ground with your front (leading) leg, then drag the trailing foot in.
  • Moving left: Push with your left (leading) leg, then drag the trailing foot in.
  • Moving right: Push with your right (leading) leg, then drag the trailing foot in.
  • Moving backward: Push with your rear (leading) leg, then drag the trailing foot in.

At the concept level, you always push with the leading foot. Using directional terms like front, left, right, or back can be confusing, but the key idea remains the same—the leading leg drives the movement.using. Using teams like leading and trailing takes us off that confusing translation.

Mental training is just as important as physical training. Many of you find it difficult to stay relaxed during emergencies—and that’s completely natural. It takes consistent practice and experience. Just like an emergency doctor, calmness isn’t something they’re born with; it’s developed through repeated exposure and training until staying relaxed becomes second nature.

Think and Review

Some ideas and suggestions:

  • Full-body tension and release: Tense all your muscles, then suddenly relax and exhale. This can also help warm you up on cold mornings.
  • Emotional control: When you feel irritated or angry, try exhaling and relaxing instantly—both physically and emotionally.
  • Mental review: Set aside time to read through the class notes, visualize the movements, and create your own summaries.
  • Body awareness: Often, you don’t realize when you’re tense. Try standing with slightly bent knees, breathing slowly and naturally, and consciously relaxing your shoulders, chest, and abdomen.

SSD – Class notes 2025-10-23

DISCUSSIONS
BODY WAVES

This exercise serves as an excellent general warm-up for the spine and the entire body. It opens the chest and relaxes the spine in a coiled position. While it looks quite different from Yoga’s cat-cow pose, it actually involves a similar spinal motion. Furthermore, you are also engaging the legs, abs, and neck as the wave motion ripples through the body. Developing control and awareness of each body segment moving sequentially provides valuable neural training for the brain.

Key-points

  • Push the knees forward.
  • Push the hips forward.
  • Extend the lower spine vertically.
  • Open your chest toward the ceiling by bending through the thoracic section.
  • Stand up through vertical with straight body
  • Then allow yourself to droop forward, starting from your head and then one vertebra at a time, while keeping the pelvis rounded and butt tucked.

Common errors:

  • Arching at the lower back instead of through the thoracic section of the spine.
  • Not pushing the hips forward enough.
  • Not moving one section of the body at a time.
  • When the body is ripping past vertical, you must keep the back and neck relaxed instead of tension.
  • Allowing the buttocks to stick out backward.

REALITY ABOUT STREET FIGHTS

  • There are no referees; you cannot tap out.
  • Even a push can be deadly if your opponent’s head hits the pavement.
  • It is not a game—there are no reset buttons.
  • Even on your best day, you may still get hit. Be prepared for pain; there’s no such thing as a free lunch.
  • You don’t know what you don’t know—the aggressor might have unseen friends.
  • A fight must never be about ego, anger, or teaching someone a lesson. It must be about protecting something more important than life itself.

PICKING TARGETS

Focus on soft, vulnerable targets such as the eyes and nose—areas that are especially painful and effective for self-defense.

When you are under stress, it is hard to manage things requiring a lot of precision. For example, you should not aim for an eye poke unless it is presented to you. Groin kicks, while effective, is well known and therefore you can miss if you telegraph.


SCENARIOS
A Frontal Push to the Chest

If you feel yourself stiffening up during training, it’s not good enough. This usually happens when the hips lock up or the panic reflex kicks in.

  • Using the body wave to absorb the force buys you valuable milliseconds.
  • Resisting the push directly often causes stiffness and creates leverage against yourself.
  • You must “step out of the firing line” as you perform the wave by spinning your pivot heel outward, then moving your other leg off the line as well.
  • If you feel yourself stiffening up during training, it’s not good enough. This usually happens when the hips lock up or the panic reflex kicks in


EXERCISES

  • Stationary Body Waves: Focus on smooth spinal motion without unnecessary tension.
  • Heel Spin: Spin the heel without lifting yourself up first. Make sure your heel, knee, and chest move as one.
  • Body Waves with Spin: Perform body waves while rotating around one leg.
  • Squat: Maintain control and grounding throughout the movement. Stay put until your legs burn and shake. Then count for another slow 8 count.
  • Projection Through the Fingers: Extend energy and intent through your fingertips as you move.

SSD – Class notes 2025-10-16

DISCUSSION

Relax

We often use the word “relax”, but here it has a specific, technical meaning. Take a look at the banner picture of the article: the “just right” state is neither tense (“fight mode”) nor limp. Neither extreme allows for effective handling.

The “just right” state is actually a range, and the only way to discover it and perfect it is through experimenting and practicing. You also need to understand the functional purpose of each movement and be adaptable to different types of food and chopsticks. As an example, when you pick up tofu with chopsticks, you can’t squeeze it like you would a piece of chicken — you must adjust your grip.

Key points to get out of wrist grabs without escalation

When we reviewed techniques for escaping wrist grabs, several key concepts were common across all of them:

  • Project through the fingers
  • Pivot point
  • Relax physically and emotionally
  • Flow with the force and find weakness.

To help you remember these, use the phrase “Please Practice Relax First.”

  • P – Please: Project through the fingers. Extend your arm with focused intent, as if energy is flowing outward. This helps create a stable and functional lever.
  • P – Practice: Pivot point. Keep your pivot point steady — it should not move or wiggle. It’s a key element in creating leverage.
  • R – Relax: Relax physically and emotionally. This helps you think clearly and avoid wasting effort by trying to move your opponent’s entire arm. It also prevents triggering their defensive reaction — your body language and mindset matter.
  • F – First: Flow with your opponent’s energy. For example, when your opponent grabs you, their fingers exert inward pressure. Instead of resisting outward, find ways to move inward without fighting it directly.

Weaknesses in the human grip

Fingers – We grab objects like groceries or tools by bending our fingers inward. To tighten our grip, we squeeze inward. If someone push my fingers inward, I am more likely to loose the grip.

Wrists – The wrist is strong on the palm side because it’s used frequently for lifting. The back of the hand, however, is much weaker since it rarely bears weight. While you can always train yourself stronger, but if you compare your own strength inward vs outward, you will find one direction is weaker.

Grip – When someone grabs your wrist, they aim to control you. If you remain relaxed, a single hand grip can only restrict you at the grip but not anywhere else — you can still move your fingers, smile, turn your head, or bend your knees. But if you tense up or panic, that grip will control your whole body.

Situational Awareness and Strategy

When we communicate, we express ideas and respond to the topic at hand — adapting our tone and wording depending on the situation or the person we’re speaking to. Sometimes we even use body language like a smile, a smirk, a wink, tension of the body, etc.

When it comes to fighting, a lot of people thought it is fundamentally different and expect to have standard solutions like the routine/form they practice everyday. When they are told “it depends…” and asked to understand the mechanics and concepts behind the technique, they think it is too complicated. But life is complex. Intelligent conversation — like martial adaptability — is difficult to both teach and learn.

Fighting is just another form of interaction, with higher stakes. Through martial arts, you’ll gradually understand not only yourself but also how others think and react.

SCENARIOS

High crossover wrist grab

Key Points

  • Relax and turn the wrist slightly so the palm faces downward.
  • Align your fingers with your opponent’s forearm.
  • “Wipe” 90 degrees with the fingers leading the motion.
  • Wrap and grab your opponent’s arm to steer them into a non-confrontational but strategic position.

Reviewed all the other grips learned so far

Through repetitions with different partners, you start to see the common thread that links all these together. You will also be able to remember the key-points that make it work instead of just imitating what may not be important.

Common Mistakes

  • Tensing the arm, causing the whole arm to move and sometimes even ended up trying to lift your opponent’s entire body. You should instead attempt to affect only his wrist and fingers.
  • Lifting the shoulder or elbow to “fight” the grab.
  • Forgetting to follow through to the strategic position.

EXERCISES

We didn’t have time for exercises together, but I trust you’re motivated to train on your own. Continue with the exercises from previous classes — your leg muscles and core could always use more work. Or maybe a simple plank for a couple of minutes.

SSD – Class notes 2025-10-09

DISCUSSION

Examples of things to do if you are early

  • Warm-up – Do a quick warm-up before class, since we won’t be doing it together as a group. You should already have warmed up a little before leaving home so that your body is ready for anything. A short warm-up helps you transition smoothly into training and prevents injuries.
  • Partner drills – Since class time is often used to cover new material, take advantage of the opportunity to practice with a partner when you can. Use this time to refresh your memory and test your reactions so that your responses become more instinctive and automatic.
  • Different partners -Each person’s height, weight, strength, and reactions are different. The more people you practice with, the more varied your experiences become, and the better prepared you’ll be for real-life situations.
  • Ask questions – If you have questions, ask them! Make the most of the time when I’m available to clarify techniques or concepts.

LRT (Listen, resources, target) – 3 pillars of self defense

Story: When I was coaching young kids, I noticed that I have much better success with them during class if I play some “listening games” right at the start. Once you can grab their attention through their urge to win the contest, half the battle is solved. By listening to their teacher / coach / parents willingly, you not only keep them safe, they are actively learning through listening better.

The SkyTrain’s original planning name was ALRT (Advanced Light Rapid Transit) or sometimes simply LRT. As an aid for memorization, we use the acronym LRT to represent the three major pillars of self-defense.

  • L – Listen / Look / Learn – These represent the tools you use to detect and anticipate danger. Always stay aware of your surroundings.
  • R – Your conditioning, training, knowledge, awareness of your environment, physical strengths, time, understanding of the opponent’s weaknesses, and even nearby strangers or traffic passing through—all are resources you can use. Effective self-defense is about maximizing your own resources while minimizing those of your opponent.
  • T – Target – This involves changing the WHO or the WHAT is targeted. For instance, pretend to have a conversation with a total stranger, redirect attention, or maintain a confident posture to make you a less appealing target. Ask yourself: What is your opponent’s likely goal or intended target? Can you alter or hide the target? Can you cause them to hesitate, reset, or redirect their focus?

Managing distance

If you are too close to a potential threat, you won’t have enough time to react or defend yourself effectively. When you notice someone suspicious, maintain a safe distance before anything happens. Staying aware of people and things around you—without being anxious or panicky—is an excellent habit for situational awareness.

SCENARIOS

Experiment: Strong support line vs perpendicular line

In the bow-and-arrow stance, the “strong line” runs heel-to-heel. Force applied along this line can be resisted more easily. However, pushing from the perpendicular line (relative to the heel-to-heel line) is much harder to resist and therefore has greater effect. Understanding this helps you control direction and stability.

Note: While the concept is “perpendicular (to the line of support), things doesn’t have to be exact. There is an tolerance of deviation base on your physical attributes like strength.

EXERCISES

Push the wall

This exercise develops a powerful push that comes from your whole body—not just your arm muscles.

Common mistakes:

  • Arching the back when you meet resistance, forgetting to engage your core for support.
  • Leaning in with straight arms, relying only on body weight instead of muscular strength.

Correct form:

  • Bend your legs slightly to engage your legs and glutes.
  • Keep your arms bent so your triceps can assist in the push.
  • Maintain a firm, supported spine and active abdominal engagement.

Arch the back / Pelvic Tilt / Normal relaxed position

Learning to control your tailbone and hip movement is essential—not only for martial arts but also for protecting your hips and groin during falls.

Posterior Pelvic Tilt:
Known as “tucking your tail under,” similar to a dog lowering its tail after losing a fight. In this position, the “bucket” tilts backward and the groin moves slightly forward.

Anterior Pelvic Tilt:
Commonly described as “sticking your butt out.” Imagine your pelvis as a bucket tilted forward when your tailbone sticks backward.

Practice Tip:
If you have trouble isolating your hip movement, place a cushion against the side of a table and press your hip into it—without moving your upper body. You’ll feel how the lower abs help move the hips forward or backward.

SSD – Class notes 2025-10-02

DISCUSSIONS

We don’t always have the luxury of having an extra 10–15 minutes before class to warm up or ask questions. However, we are fortunate that no one is ahead of us in the program. I encourage everyone to take advantage of this opportunity. Ultimately, fighting and survival are about the ability to see and make use of opportunities as they arise.

Structural versus muscular power

When you perform an action such as standing or lifting, you are of course using muscles—but the focus should be on the intent or function you are trying to achieve, not on the muscles themselves.

Bodybuilders, for example, tense muscles on both sides of a joint. This makes them look bigger but actually limits speed and fluidity of movement. Our goal is not to show off muscle size but to make movements effective and functional. This is called technical relaxation—using only what is necessary for the task without unnecessary tension.

A few key comparisons:

  • You don’t tire easily when relying on structural power. When relying solely on muscular power, fatigue sets in quickly unless you’ve trained specifically for endurance.
  • Structural power requires no reaction time when your body’s shape and alignment are already positioned to handle force from that direction.
  • As seniors, if you lack muscular strength, you must substitute it with power generated from other sources, as discussed below.
  • Muscles are still essential for daily activities such as standing, balancing, climbing stairs, and carrying groceries. Keep exercising to slow natural deterioration.
  • Those who bully you at your age are likely bigger and faster. Competing through muscle alone is not the best strategy—structure and technique are your advantage.

Escalate only when it is absolutely necessary

An ethical approach is paramount to acquiring fighting skills. You must understand the responsibility that comes with the skill. Any physical action, like punching someone, has repercussions. The mindset should be to start with the ‘gentle side’ rather than escalating a situation. This philosophy is a core part of the training, taught to prevent misuse of the skills learned.

Wavering between ‘fight-or-flight’ will guarantee a bad ending. You need to think ahead where your red-line is. Even if you decide not to fight, you must position yourself strategically: for example, maintain a good distance between you and aggressor; furthermore, are you repositioning yourself to a safe spot after every effortless skill? Can you redirect the body angles to something less aggressive?

Functional focus vs muscle contraction focus

When you stand, you don’t really know you are using muscles but you are. You don’t need to focus on naming the specific muscles or the contraction of any muscles. Any focus on tensing up any specific muscles is over doing it and may be applicable only if training those muscles is the purpose.

How to get yourself stronger?

Remember this phrase: “Bruce Lee Made Me Cry.”
(The first letter of each word represents one of the key categories.)

  • B – Big muscles: These major muscles do most of the visible work. When training alone, people often focus only on these large muscle groups.
  • L – Little muscles: Smaller stabilizing muscles engage when the large ones tire out. Because they’re weaker and less coordinated, fatigue often shows as shaking in certain parts of the body.
  • M – Mind: We demonstrated the power of the mind through the firehose projection experiment. Changing what or where you focus dramatically alters the outcome.
  • M – Mechanics: Familiar principles such as leverage, angles, and structure all influence how efficiently you use your strength.
  • C – Coordination: The difference between a trained unit of soldiers and an unorganized group is coordination. When an order comes, trained soldiers act cohesively. Likewise, a trained body functions as a coordinated team—each part working in unison toward a single goal.

By projecting your intent and structure together, you force the opponent to deal with your entire body’s mass and alignment, making your technique far more effective.

SCENARIOS

“Being shoved from behind (or pulled from front)”

  • Go with the flow to absorb the force
  • Push the butt backwards to counterbalance the forward momentum of the upper body
  • DO NOT start with bending your leg as that accelerates the descend
  • Each of the following help reduce the impact of the fall: 1) going with the force helps reduce the force forward 2) pushing the butt back help reduce the weight on the front of your support 3) halving the body helps reduce your height 4) the net of the velocity backward and the upper body pushed forward is a lot less

If you have trouble distinguishing between pushing your butt back and leaning your upper body forward, stand about eight inches from a wall or similar obstacle. Then, gently push until your buttocks touch the wall—without leaning into it. Your upper body should lean forward just enough to counterbalance the backward motion of your hips.

“Two hands on shoulder” – We used this scenario to show how you can neutralize a much stronger opponent’s grip without direct resistance. The key mechanic here is similar to a door stopper or a pebble in the track of a sliding door—a small but strategic action that disrupts movement.

“What if it change to grabbing your shirt?” – When a conflict escalates to a point where an effortless solution is no longer possible, you may need to respond more assertively. For example, I might reach out and press on the opponent’s throat while stepping toward them to regain control and space.

EXERCISES

You don’t always have a partner feeding you pushes or grabs. So it is important to be able to work independently as well as work with a partner when you have a chance.

Reference points and projection – When discussing leverage systems, there is always a pivot point—like the center of a seesaw. The pivot remains fixed, and the board must be straight and strong. We simulate this by projecting a line of force from the belly button through the fingers. In some cases, such as the door stopper example, you need to prevent the opponent from moving with you to create an opening for escape.

Isolation and integration of different body parts – Work on moving individual parts of the body independently. For example:

  • Draw circles with your shoulders, both forward and backward.
  • Try arm circles—one arm forward while the other moves backward.

Caution: Move slowly and mindfully. Don’t hurt yourself.

Squat – Stay in a squat position until your legs start to burn and shake, then sustain it for an additional count of eight. This builds both strength and mental endurance.

Do you know why we keep the back parallel to the ground in this squat?